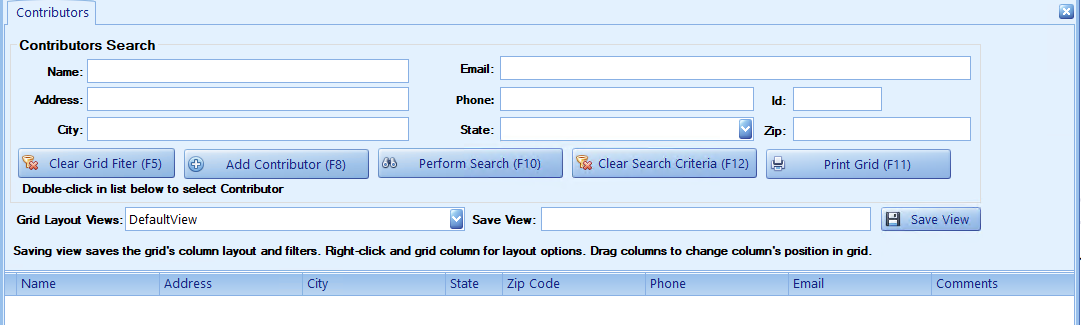
This menu option allows you to view, update, or delete contributor(non-member contributors) information. Select Contributors from the Forms menu within Data Entry Forms to display the form as shown below in Figure 3.4.
Figure 3.4.
Contributors Search Box
It will display a list of contributors. You can search using one or more of the inputs within the Contributors Search box by entering the values and pressing F10 key or clicking the Perform Search button. It will refresh the list based on your search criteria. Clear Grid Filter and Clear Search Criteria buttons will clear out any search criteria entered in the Contributors Search box.
Filtering Contributors List
Click on any column heading such as Name then click the checkbox for the desired values to display just those contributors in the list or enter text to search on. It works in the same way Members and Families search boxes work.
Grid Layout Views
The grid that displays the list of contributors view can be altered by dragging columns using the column heading to the left or right and then in the Save View entered a name for the customized contributor list view. The new view will be in the Grid Layout Views list so you can select a different layout view to view the contributors list. You can also right click on a column header to hide a column or perform other actions such as chose columns, filter, and so on.
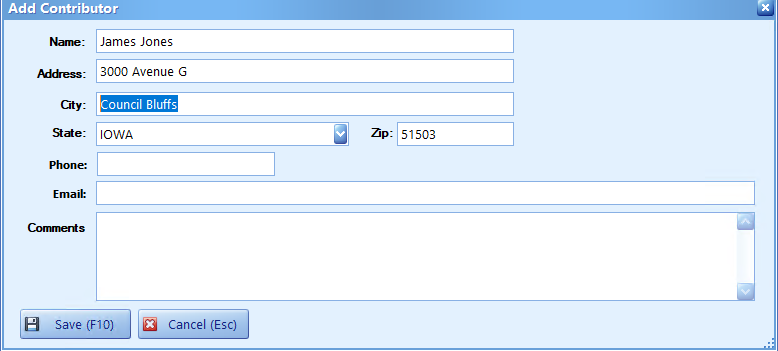
Adding a Contributor
Click Add Contributor or press F8 to display the Add Contributor form as shown below in Figure 3.5. It will used the default city, state, and zip code values set in FrMy Preferences. Enter the required information and click Save to add the contributor or Cancel to return to the contributors list.
Figure 3.5
Updating a Contributor
Double-click on a contributor in the list to display the Editing Visitor Form as shown below in Figure 3.6. Enter the required information and click Save to save the contributor information or Cancel to return to the contributors list. Delete the contributor by clicking Delete and answering Yes to the Are you sure you want to Delete this Contributor? It will permanently delete all the contributor's information from the database prompt. Select Email Contribution Report to send an email to the contributor's email address with all their contributions.
Figure 3.6
Entering Contributions
The Contributions tab displayed at the bottom of the form allows you enter contributions for the selected contributor. Click the Fund in the "Click here to add a new row" area to start entering a contribution. Select a Fund from the list, press the tab key to go to Date, enter date, then tab, enter amount, then tab, enter comment or tab, then the form will appear as shown below in Figure 3.7 with one contribution entered and allowing you to enter other contributions in the input row.
Figure 3.7
Once you have entered all the contributions, click Save Contribution changes to save all the contribution changes you have made. You can also click Undo Contribution Changes to undo your last contribution changes. To update a contribution just click on the row, enter the changes, and click Save Contribution changes. To delete a contribution click it will prompt you to verify you want to delete that row, answer Yes and then click Save Contributions.
Printing Contributions
Click Print Contributions to print the contribution list from another window as shown below in Figure 3.8.


 it will prompt you to verify you want to delete that row, answer Yes and then click Save Contributions.